
How to Record a Video of an Optical Design in QUADOA® Optical CAD
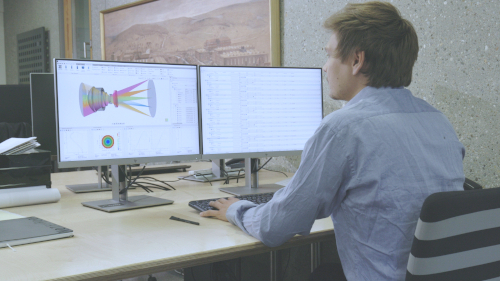
QUADOA® Optical CAD can record a video of your optical design directly from the Slider Interface. During recording, the slider moves automatically from its minimum to its maximum value, so the video shows how a parameter, such as a tilt, changes the system. You can choose the recorded area, file format, frame rate, quality and resolution, and add camera movements such as a 360° rotation.
Key points
- Video recording starts from the Slider Interface.
- During recording, the slider moves automatically from left to right.
- Record the whole QUADOA® window or a single view, such as the 3D view or a plot.
- Formats include AVI or separate images, with adjustable frame rate, frame count, quality and resolution.
- Camera settings Tx, Ty (move), zoom and Rx, Ry, Rz (rotate) animate the view.
Terms used in this article
- Slider Interface
- A window where parameters get a minimum and maximum value and can be changed continuously with a slider.
- Math expression
- A formula that calculates a value from parameters, for example a rotation angle.
- Frame rate
- The number of images per second in the video.
Step 1: Prepare the Slider Interface
- Open the Slider Interface from the menu at the top.
- Add the parameter you want to animate, and optionally a math expression. In the video, a tilt parameter drives the rotation X of an element in the Optical Design Editor.
When the recording starts, the slider runs from its minimum to its maximum value, so the video shows the effect of the parameter on the model. How to set up parameters is explained in the Slider Interface article.
Step 2: Choose the video settings
Click the Record Video icon in the Slider Interface. The video settings open:
| Setting | Options |
|---|---|
| Recorded area | Whole QUADOA® window, or a single view such as the 3D view or a plot |
| Format | For example AVI video or separate images |
| Frame rate | Images per second, for example 30 |
| Frame count | Number of frames in the video |
| Quality and resolution | Image quality and size of the video |
Step 3: Animate the camera
| Camera setting | Effect |
|---|---|
| Tx / Ty | Camera moves in X or Y direction |
| Zoom | Camera zooms in or out |
| Rx / Ry / Rz | Camera rotates around the X, Y or Z axis |
Example: set Ry to 360° for one full rotation around the system during the video.
Step 4: Record and save
- Click OK to confirm the settings.
- Choose where to save the video and click Save.
- The recording starts and the slider moves from left to right. When it ends, the video is saved on your hard disk.
Video tutorial: recording a video of your design
This 3-minute video shows how to record an animated video of a design with the Slider Interface.
Video length: 3:04 min · Also on YouTube: Video Recording in QUADOA® Optical CAD
Frequently asked questions
Open the Slider Interface, add the parameter to animate, click the Record Video icon, choose the video and camera settings, click OK, select a file location and click Save.
Yes. In the video settings you can record either the whole QUADOA® window or a single view, such as the 3D view or a single plot.
You can record, for example, an AVI video or separate images, and set frame rate, frame count, quality and resolution.
Yes. Use the camera settings Rx, Ry and Rz for rotations, Tx and Ty for movements and zoom. For example, Ry = 360° gives one full turn around the Y axis.